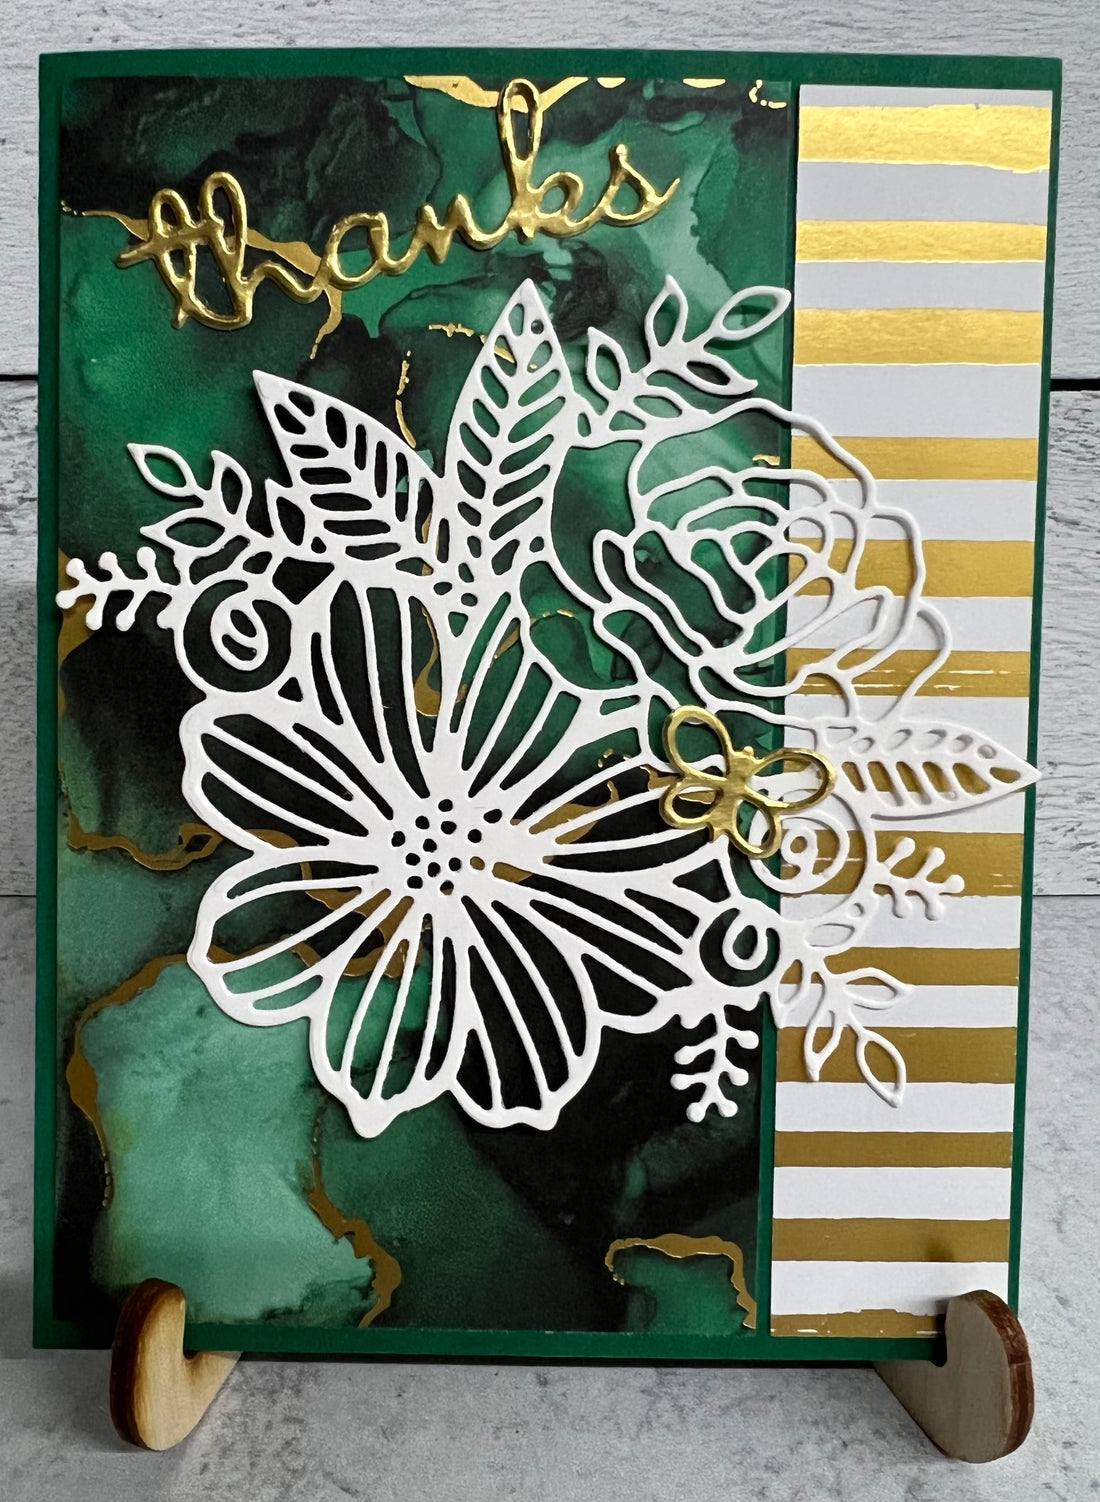
The Expressions In Ink Designer Series Paper has been one of my favorite paper packs. The Shaded Spruce and gold threads throughout the sheet used on this card is so beautiful that I didn't want to do to much to cover it up. So, using the floral die that is included in the Artistic Die set and a word die and you've got yourself quite the nice shareable card.
Here are the measurements and instructions:
Finished Card Size: 4 ¼” w x 5 ½” h
INSTRUCTIONS:
- Cut a card base of 5 ½” x 8 ½” of a piece of Shaded Spruce card stock
- Score at 4 ¼”
- Cut a piece of Expressions in Ink DSP (see photo) to 3” wide x 5 ¼” h
- Adhere to right side of card front using Snail Adhesive
- Cut a second piece of Expressions in Ink DSP (see photo) to 1” wide x 5 ¼” h
- Adhere to left side of card front using Snail adhesive
- Use the Floral die from the Artistic dies to cut a piece of Basic White card stock.
- Adhere to the center of the card front using Tombo liquid glue or a fine tip glue pen.
- You can use any word die that you have in your stash along with an additional die cut embellishment. Here we’ve used Thanks and a small butterfly from the retired Well Written
- Cut from Gold Foil sheets
- Adhere to the card front using Tombo Liquid glue or fine tip glue pen.
- Cut a piece of Basic White card stock to 4” w x 5 ¼” h
- Adhere to the inside of the card using Snail Adhesive
|
Card Stock |
Basic White Shaded Spruce |
159276 146981 |
|
Designer Series Paper (DSP) |
Expressions in Ink Gold Foil Sheets |
155464 132622 |
|
Cut & Emboss Machine |
Artistic Dies Well Written |
155371 Retired |
|
Adhesives |
Stampin’ Seal, Tombo Glue or Fine Tip Glue Pen |
|